Category Archives: pattern

Summery Infant Mesh Hat

Standard

I wanted to make a summery hat for a newborn, so I came up with my own pattern for a mesh hat.  This pattern is very stretchy, so even though it looks really small it should stretch to fit more than one head size.  It is also easily adjustable, just add extra rows of increase to increase the circumference and a few more regular rows to adjust the height

Summery Infant Mesh Hat

Yarn:  Caron Simply Soft

Hook: 4.25mm

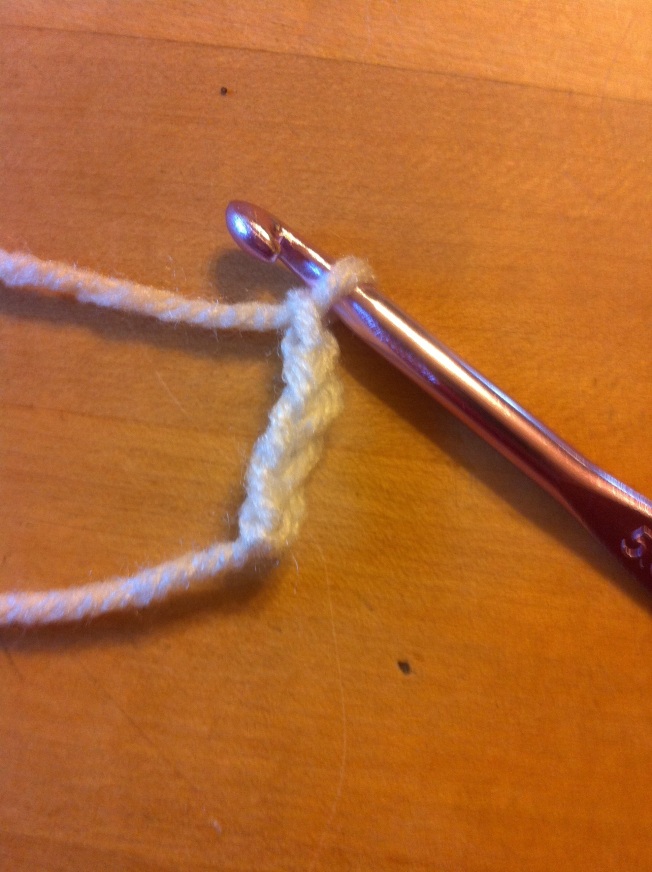
Chain 4 and join to form a ring

  1. CH4 (counts a DC CH1 here and throughout) DC CH1 11 times. SS to the 3rd chain of your beginning CH4 (12 DC and 12 ch spaces)
  2. SS into the next chain space CH4 DC CH1 into the same space. *Skip DC and DC CH1 DC CH1 into next CH1 space. Repeat from * in each CH space around. SS into the 3rd chain of the beginning CH4. (24 DC and CH1 spaces)

3-11    SS into the next chain space CH4 DC CH1 into the same space. *Skip DC and DC                     CH1 into the next CH1 space. Repeat from * in each CH space around. SS into                       the 3rd chain of the beginning CH4. (24 DC and CH1 spaces)

  1. CH2 and LOOSELY HDC in each DC and CH space around. Join with a SS to the top of the beginning CH2.

Note:  For row 12 I went up to a size 5mm hook just to make sure that it kept its stretchy quality.  This hat comes out very small, so it will fit a preemie/newborn head.  If you want to increase the size, the increase rows should look something like this:

SS into the next chain space CH4 DC CH1 into the same space. *Skip DC and DC CH1 into the next CH space. DC CH1 DC CH1 into the next chain space. Repeat from * in each CH space around. SS into the 3rd chain of the beginning CH4.

It is pretty much the same as increasing in other hats, so the increases will work the same, just with a CH1 in between each DC.

If you have any questions, let me know!

hat

Mini Crochet Basket Pattern

Standard

I found a pattern that I really liked on Ravelry, but when I clicked on it, I realized you had to pay for the pattern.  I didn’t want to pay $4 for a pattern that I was pretty sure that I could figure out on my own.  I sat down and just started crocheting and I have to say that I am pretty happy with what I came up with!  I made this one for me, but I may make a few up for Mother’s Day.  It came together really quickly, so if you are looking for a pattern that you can give as a gift at the last minute, here is my pattern for the Mini Crochet Basket.

Hook size:  K-6.5mm

Yarn: Red Heart Super Saver (I used scrap yarn, so I don’t know exact colors or yardage)

Stitches: CH-chain

SS-slip stitch

HDC-half double crochet

BL- back loop

HDCDC-half double crochet decrease

Pattern notes:  This pattern is written for beginners.   I have been crocheting for 5 years and I still have trouble keeping track of my rounds when I crochet in the round, so each row begins with a SS and a CH 1, the chain does NOT count as the first stitch.

Basket

Using both strands of yarn together, CH 4 and join with a ss

Round 1 – CH 1 and HDC into the ring 12 times.  Join to beginning stitch with a SS and CH 1 do not turn. (12)

Round 2 – 2 HDC in each stitch around join to beginning stitch and CH 1 do not turn. (24)

Round 3 – 2 HDC in the first stitch, *1 HDC in the next stitch, 2 HDC in the next. Repeat from * around. Join to beginning stitch with a SS and CH 1 do not turn. (36)

Round 4 – 1 HDC in the BL only of each stitch around. Join to beginning stitch with a SS and CH 1 do not turn. (36)

Round 5-9 – 1 HDC in both loops in each stitch around. Join to beginning stitch with a SS and CH 1 do not turn. (36)

Round 10 – 1 SC in each stitch around. Fasten off. (36)

Lid

 Using both strands of yarn together, CH 4 and join with a ss

Round 1 – CH 1 and HDC into the ring 12 times.  Join to beginning stitch with a SS and CH 1 do not turn. (12)

Round 2 – 2 HDC in each stitch around join to beginning stitch and CH 1 do not turn. (24)

Round 3 – 2 HDC in the first stitch, *1 HDC in the next stitch, 2 HDC in the next. Repeat from * around. Join to beginning stitch with a SS and CH 1 do not turn. (36)

Round 4 – 1 SC in each stitch around. Fasten off. (36)

Handle

 Using both strands of yarn together, CH 4 and join with a ss

Round 1 – CH 1 and HDC into the ring 12 times.  Join to beginning stitch with a SS and CH 1 do not turn. (12)

Round 2 – CH 1 do a HDCDC over the first 2 stitches and in each stitch across.  Fasten off. (6)

Sew the handle to the top middle of the lid.

You can also use a wooden button for the handle.  I didn’t happen to have one on hand, so I made my own!

Sew in all your ends and you have a cute little basket that you can keep all kinds of odds and ends in!  I am putting buttons in mine.

The Practice Your Stitches Scarf

Standard

My mom wanted me to make her a scarf with the Day Glow Red Heart Super Saver yarn. I looked for a pattern, but couldn’t find one that I really liked. I wanted something that would looked good with the variegated yarn and that would work up quickly. I decided to make my own using four different stitches and realized it would be a good scarf for beginner crocheters to practice their stitches. 


This scarf uses four stitches, single crochet, half double crochet, double crochet and treble (or triple) crochet. It’s very easy and works up quickly. You can use any kind of yarn you would like, I used Day Glow Red Heart Super Saver. I used a 5mm crochet hook, you will use the hook that your yarn reccommends. 

I know when I first started crocheting, the chains at the beginning of the rows threw me off, so in this pattern, the chains DO NOT count as stitches. Your first stitch will be in the same stitch as your chain. 

Ch 26

1. Single crochet in the 2nd chain from the hook (25 stitches)

2. Ch 1 (ch 1 does not count as a stitch here or throughout) and turn hdc in each stitch across

3. Ch 2 and turn Dc in each stitch across

4. Ch 3 and turn tr in each stitch across

5. Ch 1 and turn single crochet in each stitch across

7. Ch 1 and turn hdc in each stitch across

8. Ch 2 and turn Dc in each stitch across

9. Ch 3 and turn tr in each stitch across

Repeat rows 5-9 until you have reached your desired length. 

You should end on a treble crochet row. I went ahead and repeated row 5 (the single crochet row) one more time because I felt like it should end on single crochet ocher since it started on a single crochet row. I had 145 rows. 

If you want to do a fringe, measure out 72 12 in pieces of yarn. Starting on one end of your scarf, fold 3 pieces of yarn in half and, using your hook, pull the yarn through the first stitch making a large enough loop to pull the ends through. Pull tight. Repeat this in every other stitch across. Do this on both ends. 

If you have any questions about stitches, I used you tube to help me learn my stitches. Bobwilson123 is a one of my favorite channels. I used it a lot to help me learn to crochet in the beginning. 

Crochet Fingerless Gloves

Standard

There is a lady that I work with who is always cold, she keeps the office 80 degrees or above even in the summer, so i thought I would make some fingerless gloves to help her stay warmer.  I am going to give them to her for Christmas. I have written out instructions for what I did.  It isn’t really a pattern, but if you follow the instructions, you should end up with a nice pair of fingerless gloves.

CH12

  1. Dc in 2nd ch from hook and in each stitch across (10 stitches) Chain does not count as stitch here or throughout
  2. Ch 2 and turn dc in the back loop of the same stitch and in each stitch across (10 stitches)
  3. Ch 2 and turn dc in the front
  4. loop of the same stitch and in each stitch across (10 stitches)

4, 6, 8, 10, 12, 14 repeat row 2

3, 5, 7, 9, 11, 13 repeat row 3

Join the ends together to make the wristband.

Join with a slip stitch to the top (whichever side you want to) and ch1 (chain does not count as a stitch. DC in same spot.  DC 28 evenly across the top

Ch1 (does not count as a stitch) DC in the same stitch and DC in each stitch across.

4 more rows of 28 dc (5 rows of dc)

This row is a little tricky.  Decide where you want your thumb hole I did mine above the seam where I joined the wristband) and dc to that point.  Ch4 skip 4 stitches and dc around.

4 more rows of dc

Use and accent color and hdc the next row and single crochet the next row.  Fasten off

Flip it around and single crochet in the accent color evenly around the bottom of the wristband.

For the accent color around the top of the wristband, I made a chain and wove it in between the stitches and sewed the ends together on the inside of the glove.

For the bow I used the accent color

ch4 join with the first ch this creates a ring

ch2, 4 dc into the ring 4 times ch2 and ss into the ring

ch2, 4 dc into the ring 4 times ch2 and ss into the ring and fasten off.

wrap the main color of the glove around the middle of your bow and you are done and ready to fasten it on!

I ran out of yarn for my second glove, so I only have a picture of the one, but it looks really nice!!

Very Simple Granny Square Tutorial

Standard

I am going to attempt a picture tutorial for a basic granny square. You can stop after three rows, add one more or keep going to make an afghan. I am going to tell you how to do the first three rows and the rest is just repeating the same pattern around until your square is the right size.

Granny Square Tutorial

Choose your yarn and an appropriate hook. I used 5.5 since that is my favorite hook. Make a slip not and insert your hook.

20130814-132311.jpg

Chain 4 and join with a slip stitch.

20130814-132432.jpg

20130814-132446.jpg

Chain 3 (counts as a double crochet now and throughout)

20130814-132602.jpg

Two double crochet into the ring. Chain 2 *3 double crochet into the ring chain 2. Repeat twice. Slip stitch in the beginning of the chan 3. You should have 4 groups of 3 double crochets and 4 chain 2s. I will look like a square.

20130814-133044.jpg

Chain 3 and turn.

20130814-133143.jpg

In the chain two space: 2 double crochet, chain 2, 3 double crochet, chain one. *3 double crochet, chain 2, 3 double crochet, chain 1 in the next chain 2 space. Repeat from * 2 times. Slip stitch to the top of the chain 3.

20130814-134837.jpg

Chain 3 and turn.

In chain one space: 2 double crochet, chain 1

In chain 2 space: 3 double crochets, chain 2, 3 double crochets, chain 1.

20130814-142512.jpg

3 double crochets, chain one in each chain 1 space and 3 double crochets, chain 2, 3 double crochets, chain 1 in each chain 2 space.

20130814-143205.jpg

And there is is! Easy peasy, right?

If I am going to make a regular granny square, I usually do 4 rows with the first 2 rows being one color and the next two a different color. The beauty of a granny square though, is that they are so versatile. You could change colors every row or not at all. You can keep following the pattern and make an afghan. Or you can make a bunch of small ones and attach them together and make an afghan that way. You can even start with more stitches at the beginning to make a hexagon instead of a square and you can make a sweater or a blanket that way.

20130814-143937.jpg
This is a sweater I made using the hexagon “granny square” pattern. It is super easy once you figure it out. 🙂

I know these are pretty recent pictures, but here are two blankets that I have made recently using this basic granny square pattern.

20130814-144350.jpg
This is a basic granny square blanket with a flower sewn in the middle.

20130814-144516.jpg
This one isn’t quite done yet, I am having a fleece lining added to the back, but you can see what I did. I used both methods of making the giant granny square and a bunch (24 to be exact) of little ones to make this blanket. It was a little tricky to do the first row after the little squares, but I think it worked out. 🙂

You can experiment with your granny squares and see what works best for you. I have changed how I do my squares from this method to something I like better, but it looks the same, so it is up to you! 🙂 happy hooking!

The coolest hat EVER!

Standard
The coolest hat EVER!

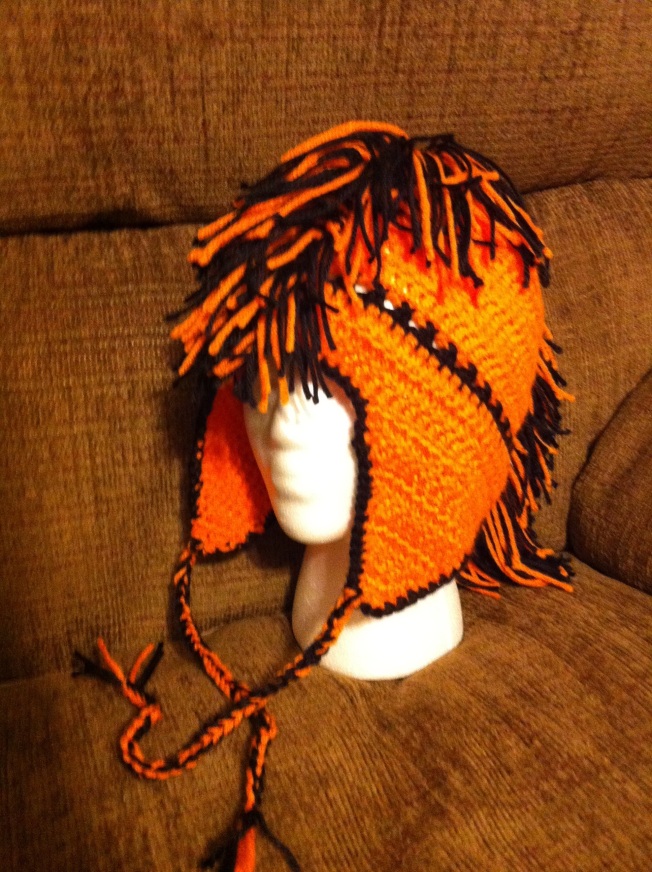
I found a hat online that I wanted to try and come up with a pattern to make a hat similar to it. I had a friend who wanted a hat and I thought the style suited him, so I tried to come up with something. I think I succeeded! 🙂

NOTE: I have had several comments on ravelry and one here. When I made this hat, I did it more than once, it came out as an adult man’s sized hat. If yours is coming out smaller you may need to adjust your hook size.

http://www.bevscountrycottage.com/size-chart.html#hat

The link above is a sizing chart that works out pretty well.

20130419-105136.jpg
Here is the original one that I found on google images.

And here is mine…

20130419-105335.jpg

20130419-105428.jpg

20130419-105510.jpg

20130419-105532.jpg

Here is the pattern I came up with, it is super easy!

Kayla’s Mohawk hat

Main Hat

Ch 4 join with a slip stitch

Row 1 – With color A, Ch 2 double crochet 11 times into the ring join with a slip stitch on top of ch2. Ch2 and turn.

Row 2 – Double crochet in same stitch as ch2, *1 double crochet in the next stitch, 2 double crochets in the next stitch. Repeat from * around. Join with a slip stitch on top of ch2. Ch2 and turn.

Row 3 – Double crochet in the same stitch as ch2, * 1 double crochet in the next 2 stitches, 2 double crochet in the next stitch, repeat from * around. Join with a slip stitch on top of ch2. Ch2 and turn.

Row 4 – Double crochet in the same stitch as ch2, * 1 double crochet in the next 3 stitches, 2 double crochet in the next stitch, repeat from * around. Join with a slip stitch on top of ch2. Ch2 and turn.

Row 5 – Double crochet in the same stitch as ch2, * 1 double crochet in the next 4 stitches, 2 double crochet in the next stitch, repeat from * around. Join with a slip stitch on top of ch2. Ch2 and turn.

Row 6-13 Double crochet in each stitch around. Join with a slip stitch on top of ch2. Ch2 and turn.

**Row 14 is optional, you can just continue Row 6 until the hat it long enough. **

Row 14 – With color B Ch2 skip first stitch and crochet in the next stitch, double crochet in the skipped stitch, this creates an . Ccontinue the cross stitch around to the ch2, join with a slip stitch.

Row 15 – With color A, Double crochet in each stitch around. Join with a slip stitch on top of ch2. Ch2 and turn.

Row 16 & 17 – Repeat row 15 fasten off.

Ear Flaps

Count over 9 stitches from the middle of the hat and put a stitch marker in the 9th stitch. Count over 14 stitches and add another stitch marker. Do this on both sides.

Row 1 – With Color A, join where your first stitch marker is, ch1 and double crochet in the same stitch. Double crochet to the next stitch marker, ch2 and turn.

Row 2 – Double crochet decrease over the first two stitches. Double crochet in each stitch to the last two stitches and decrease again.

Row 3-7 – Repeat row 2 decreasing each row as you go. Fasten off

Repeat on the other side.

Join with Color B anywhere on the hat (I prefer the back), ch1 and *single crochet in each stitch to the ear flap, single crochet evenly around the flap repeat from* around join with a slip stitch and fasten off.

Ties

I used 3 strands of yarn to make the strings. 2 of color B and on of Color A. Join in the middle of the bottom of the ear flap ch35 fasten off. I added a few extra strands of yarn at the end to make the end seem fuller, but I didn’t want pom poms.

Mohawk

Start at the back find the middle (the middle of my hat was where I fastened off with Color B). You will be adding the mohawk to the middle 3 stitches. Cut 3 strands of yarn, 2 of one color and 1 of the other (I did 2 of Color B and 1 Color A) cut approx. 6 in and add it to the hat just like you would fringe on a blanket. to the hat just like you would fringe on a blanket.

20130419-121437.jpg
This is what it will look like at the base of the Mohawk.

Repeat in each row until you reach the top of the hat. I added a little extra yarn all the way around the top so it was fuller and there isn’t a part right in the middle of the Mohawk.

20130419-121618.jpg
This is what mine looked like at the top.

Continue adding the fringe all the way to the front. You should end up with a Mohawk that ends up right in the middle if the hat. Put the hat on and trim the Mohawk in the front so it isn’t in your eyes, and then you are finished!

If anyone would like a picture tutorial of the mohawk, let me know and I will post one.

Kayla-Preemie hat with Ribbon pattern

Standard

I wanted to start posting my patterns for the hats I make. I have written it out so someone who just has the most basic knowledge of crochet can figure the pattern out. I hope it is easy to read! Let me know! 🙂

Chain 4 join with a slip stitch

Row 1:

Chain 2 half double crochet 11 times in the ring (12 stitches) Join with a slip stitch in top of beg. chain

Chain 2 and turn

Row 2:

Half Double crochet in same stitch as chain

2 Half double crochets in each stitch around (24 Stitches) join with a slip stitch to the top of beg. chain

Chain 2 and turn

Row 3:

Half Double Crochet in same stitch as chain

*One half double crochet in next stitch and 2 half double crochets in the next. Repeat from * around. Join with a slip stitch to the top of the beginning chain. (36 Stitches)

Chain 2 and turn

Row 4:

Half double crochet in each stitch around

Row 5:

Repeat row 5 until the length of your hat measures about 3 inches

Next Row:

Chain 3 and turn

*skip next stitch and double crochet in the 2nd stitch from the chain, chain one. Repeat from * around join with a slip stitch in the beginning chain. (this row creates space for you to weave in your ribbon)

Chain 2 and turn

You can do this next row however you want, you can single crochet in each stitch around, but I prefer the half double crochet because it is a little stretchier than the single crochet.

Finishing touches:

Thread the ribbon through the half double crochet row and tie a bow! J If the baby has Anencephaly, it is usually good to add ties. I usually use the same ribbon as the bow and starting at one side thread the ribbon through the same row as the bow, but behind it. Thread it across the front and stop when the ribbon is half way around stop and leave a tail so they hat can be tied on.

20121206-202617.jpg

20121206-202750.jpg

Kayla-Flower Pattern-My First

Standard

I want to post the flower that I made up. It is easy, but I am worried that I am not good at explaining. Please bear with me and ask me any questions if you have any!

20121203-202535.jpg
I used my favorite yarn and hook. You can use any hook and yarn you want.

20121203-202702.jpg
Chain 4 and join with a slip stitch

20121203-202759.jpg
Chain one and 10 single crochet in the ring.

20121203-203028.jpg
Chain 4, skip on stitch and slip stitch in the next stitch. Repeat 4 times. You will have 5 loops.

20121203-203350.jpg
Slip stitch into the first loop half double crochet 5 times. Slip stitch in the same loop.

20121203-203847.jpg
Repeat last step in the last four loops.

20121203-204140.jpg
Slip stitch into the skipped stitch.

20121203-204222.jpg
Chain 6 and slip stitch into the next skipped stitch.

20121203-204323.jpg
Repeat in each skipped stitch. This is what the back will look like.

20121203-204553.jpg
Slip stitch into the first loop and double crochet 8 times and slip stitch in the same loop. Repeat in the rest of the loops

20121203-205317.jpg
Fasten off and there is your flower! 🙂